
Introduction:
Nowadays, virtualization is a solution which is interested by many IT manager. By converting existing system to virtual, you can save lot of money from buying new hardware every year, avoid hardware conflicts when you move virtual to another computer, etc. But when you convert system to virtual, you still need OS to run virtual software (VMWare, Virtual PC, etc).The best practice is to have Linux operationg system running on host so that you won’t have to pay an additional license. Then, you can have whatever OS you want on virtual. For virtual software, VMWare is the one I recommend to try. There are some free licenses if you want to try. Like VMWare Server, you can have many virtual on a PC and you can connect to manage your virtuals remotely by using VMWare Server Console. This article shows how to install VMWare Server on Redhat Enterprise 4.
Step-by-step
1. Install prerequisite program on Redhat. To install VMWare Server on Linux, you need to install gcc compiler and xinetd before install VMWare Server. By default, xinetd is already installed on Redhat Enterprise 4 so you only need to install gcc.
* To install gcc, click Application -> System Settings -> Add/Remove Applications.

* Browse to ‘Development’ section and check ‘Development Tools’. Click update.

* This will show what are going to install.
Note: To install this, you may requires Redhat installation CD (disc 3).
2. Now download VMWare Server for Linux from vmware.com. Also, you need to register for a free serial number. When writing this article, the latest version is 1.0.4. I have copied the setup file to my desktop. In this example, I logged in as ‘root’ for installation and configuration VMWare Server.

3. Open terminal, extract the zipped file by type ‘tar xvfz “your-file-name.tar.gz”‘.
- tar xvfz VMWare-server-1.0.4-56528.tar.gz


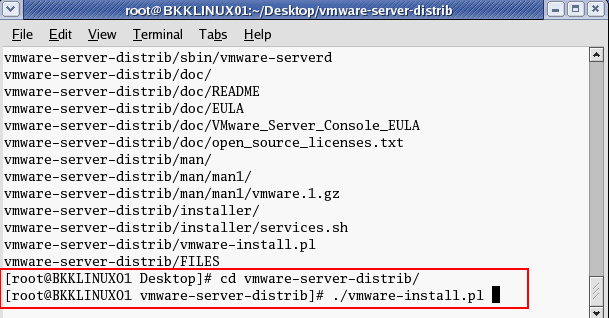
5. Run the installation file. Open Terminal and change directory to the extracted folder and execute vmware-install.pl.
- cd vmware-server-distrib/
./vmware-install.pl
* The installation file asks for paths to install files (1-7).

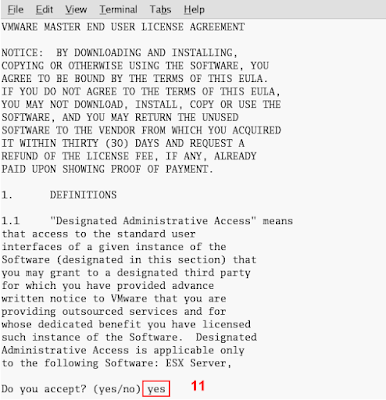
* The installation file asks for path to install documentation (8-9). Also, it asks for configure VMWare Server now (10). If yes, press Enter to view End User License Agreement (10).

* Press Ctrl + C to exit the EULA and type ‘y’ or ‘yes’ to accept the EULA (11).
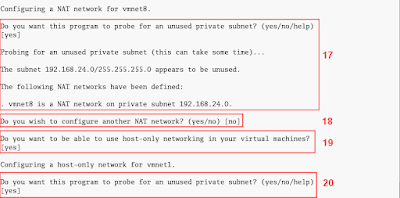
* The configuration continue asks for path to install file (12-14) and whether to configure NAT network for VMWare Server now (15-16).

* The configuration asks for configure Host-only network for VMWare Server (19-20).
* The configuration asks for port which for remotely connection to this VMWare Server Console (22).

* The configuration asks for path to keep virtual machine files (23) and serial number for VMWare Server (25). You can get one by register at vmware.com for free. If you don’t have now, you can enter this number later but it suggest you should enter it now. Otherwise, you need to re-run the config file again.
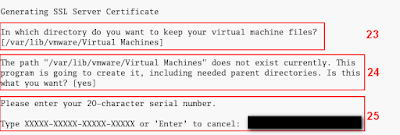
* Whether you enter the serial number now or not, the configuration is finished. You’ll see VMWare service is starting.

7. Try open VMWare Server Console, select Applications -> System Tools -> VMWare Server Console.

8. VMWare Server Console ask you to connect to which VMWare Server. Select Localhost and click connect.

9. That’s it. You can manage your virtual machine here.

Enjoy .. :)
No comments:
Post a Comment