Friday, July 29, 2011

How to enable desktop effects in Ubuntu


In previous versions of Ubuntu, if you wanted wobbly windows and eye candy, you had to follow complicated HowTos full of a lot of copying and pasting of cryptic commands, with the very real possibility of you screwing up your graphics configuration to the point where it's unusable.

Now (as of 7.10) Ubuntu allows you an easy way to enable desktop effects. Keep in mind that you may have to enable proprietary video card drivers if you have an Nvidia or ATI video card. See an example of this (using Nvidia as an example) here.


Go to System > Preferences > Appearance


In Appearance Preferences select the Visual Effects tab.


Then, select Normal or Extra, depending on how fancy you want your desktop effects to be.


Ubuntu will try to enable desktop effects. If the trial works, you should see this dialogue, and you can decide to keep the newly enabled effects or revert back to having no desktop effects.


If the trial doesn't work, you'll be told Desktop effects could not be enabled, which may mean that you don't have the proper video drivers installed or that your video card cannot support desktop effects.

If you're having trouble setting up desktop effects, please search or post a support thread in Desktop Effects & Customization subforum of the Ubuntu Forums

How to Create and Configure a VHD in Windows 7


One of the most anticipated features of Windows 7 is its native Virtual Hard Disk (VHD) features, the format that is used in Virtual PC and similar virtualization platforms.

Windows 7′s VHD support will give users the ability to install any operating system that supports booting from a VHD into a VHD. For example, a user could have Vista installed on a single partition, and then have three files (VHDs) anywhere on that disk (or for that matter, on any partition that is readable by Windows) and be able to boot different versions of Windows 7. Assuming that SP1 and SP2 were released (which they are not yet available), a user could hypothetically have four operating systems on a single partition (the number is only limited by the bootloader, four is actually just a random number selected), like so:

  • Vista installed on a primary partition (such as “C:”).
  • Windows 7 RTM installed within a VHD (such as “C:Windows7.vhd”).
  • Windows 7 SP1 installed within another VHD (such as “C:Windows7SP1.vhd”).
  • Windows 7 SP2 installed within yet another VHD (such as “C:Windows7SP2.vhd”).

Of course, the number of VHDs is virtually unlimited, but it’s quite easy to see the hype associated with VHDs in Windows 7. Now, as for creating a VHD in Windows 7:


How to Create and Manage a VHD in Windows 7 

1. Go to the Start Menu (or Desktop) and right click “My Computer” and click “Manage.” This is the easiest way to access Computer Management, but it can also be accessed via the Administrative Tools as “Computer Management.”


2. Now click on “Disk Management” under “Storage” in the sidebar. This will present you with a list of partitions on your computer. Now, to create a VHD, you can either right click “Disk Management” and click “Create VHD” or you can go to “Actions > Create VHD.”


3. This should cause a new window to appear, titled “Create and Attach Virtual Hard Disk.” Now, specify where you would like your .VHD stored (you can type the location or use the “Browse” function shown.” Then select a size (remember that you can choose between MB (Megabytes), GB (Gigabytes), or TB (Terabytes). Now, here comes an important option that is entirely down to user choice.

Selecting the Dynamically Expanding format means that as the files within the VHD increase in size, so will the VHD in question. Unfortunately, this format is a little slower than a Fixed Size format, which allocates all space selected immediately (meaning that even if the files inside the VHD measure, for example, 200MB, the disk will still be 600MB (assuming that you selected 600MB for the size of the disk)). However, a Dynamically Expanding disk can be quite useful for those hurting for disk space; even so, it’s entirely your choice, either format will do. Just make sure that the size of the disk is large enough to handle whatever you plan on placing inside of it. When you’re done, click “OK.”


On a writer’s note, I personally prefer Fixed Size disks.

4. Now, we need to initialize the disk so that Windows can access it. To do so, scroll down (if needed) inside of the detailed partition map at the bottom of Disk Management and find the disk that you just created (percentage bar should be black inside of blue). Now, click the button where it says Disk 2, Unknown (yes, it’s actually a button). You can then either right click the button and select “Initialize Disk” or go to “Action > All Tasks > Initialize Disk.”


5. This should bring up a new window titled “Initialize Disk.” Make sure that your new disk is checked and select “MBR” (I do not suggest selecting GPT unless you know why you need it). Afterwards, click “OK.” This will initialize the disk and allow you to create your first partition on the disk. To do so, either right click the “Unallocated” box and select “New Simple Volume” or go to “Action > All Tasks > New Simple Volume.” 


6. This will present us with a new window titled “New Simple Volume Wizard.” Click “Next.” Unless you want to create two partitions on this disk, simply click “Next” again (if you would like to create two partitions, then make sure that you edit the simple volume size to leave some free space on the disk; however, most users will not need this option). If you would like to mount the disk with the new partition as a separate volume (allowing you to access it in Explorer with a different drive letter), then simply click “Next.” However, if you would prefer to have the disk mounted as a folder (for example, the root of the disk would be located at something like “C:tmp”), then select “Mount in the following empty NTFS folder” and either type the location of the folder or click “Browse,” select the folder, and click “Next.” If you don’t want to access the partition whatsoever yet, then select the third choice and click “Next.” Now, unless you know what you are doing, simply select a Volume Label and click “Next.” You can now review your choices (and optionally go back and change anything); afterwards, click “Finish.” 


7. Your new VHD should now be accessible.


This was originally going to be a full guide on VHDs for Windows 7; however, I have decided to split it into several parts (I will eventually cover how to install Windows 7 into the VHD, how to attach and remove the VHD, and how to add the VHD to the bootloader in Vista, as described in the beginning of this document) as it has become way too long to add anything else (1001 words). So keep an eye out for my next article.

How To Create A Partition In Windows 7


Similarly to Windows Vista, Windows 7 has a built in utility to partition a hard drive. Many people like to partition their hard drive for multiple reasons. To boot from a different OS This isn’t necessary any more if you have Windows 7 Ultimate, which supports booting from a VHD, see here or to help you manage where you store files and programs etc… particularly if you have a large hard drive.

1. Go to Start -> Right Click My Computer -> Manage


2. You will then be brought to the Computer Management Program


3. Click on the Storage bar and under it click on Disk Management


4. Then select the Drive you want to partition, In this example I will select the Drive D: “Vista”


5. Now right click on the drive and select Shrink Volume


6. You will then be presented with a Window showing you the Size of the Hard drive and the total amount available to Shrink. Since my hard drive is quite full I have a smaller amount available to Shrink. Enter in the amount you would like to shrink ( This will be the size of the new partition ) It can’t be more than the amount available to you and remember that Approx 1000 Mb = 1 GB


7. After you have entered your values, click shrink and let it do it’s thing. Depending on the size of the drive and amount to shrink this could take a while. Just be patient and once it’s done you will see an unallocated space which is the size you just shrunk the volume by. Select it and right click and then select New Simple Volume


8. Follow the Wizard that appears and fill in the Size of the Partition, Generally the size you just shrunk the drive by.

9. Assign a drive letter, Pick one of your choice it doesn’t make a difference

10. Then on the Format page, Ensure NTFS is selected and then Enter a name for your Drive – ie. “Music” and click next followed by finish 


There you have it, A new partition on your hard drive to do what you like with it.

Windows 7 RC on VMware Workstation 6.5.2

image Yes, it works! Now start downloading the Windows 7 RC and continue reading. Like many of you, the Workstation team scrambled to download the release candidate as soon as it was made available to us. After trying to download it for ½ a day, (MSDN & TechNet crashed) we finally got our copy and started playing with it.

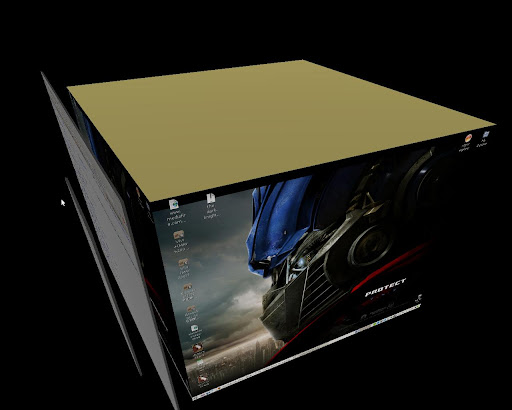
There’s been a lot of buzz flying around about Windows 7 and what better way to try out a new operating system and see how it works than in a virtual machine. I am happy to report that you can run Windows 7 RC in a VMware Workstation 6.5.2 VM with all the great features you have come to love, including file drag and drop, text copy and paste, automatic screen resize, shared folders, and Unity. However, before we go further, I want to remind you that Windows 7 RC, both 32-bit and 64-bit, is not an officially supported guest at this time. We plan to support Windows 7 as a guest OS in a future release. This statement reminds me of the great new Mac ad “Legal Copy”.

By the way, if you do not have a copy of VMware Workstation, now is a great time to download a free trial and give both Workstation and Windows 7 a try at the same time. It’s a great way to find out how well your favorite application runs or application you are developing will run in Windows 7. This is one of those rare times when you can get a Windows OS to try without having to purchase a license upfront.

After going through the process of creating a Windows 7 VM, we decided to share some best practices on how to make this happen with some screenshots and suggestions to make it nice and easy for you.


Let’s get started. Based on our initial experience with Windows 7 RC with VMware Workstation, we recommend the following VMware settings:
- In New Virtual Machine Wizard, use the “Typical” Configuration
- The wizard will auto detect Windows Vista, let it run Easy Install for Vista
- Dedicate at least 1GB of Memory
- Use 40GB Disk Capacity if you plan on installing Office and some additional applications
- Recommend that all users create a custom Power Management Plan (details below)
- If you do not enter a Windows license key, watch for the Windows install screen asking for which version of Windows to install

For those looking for some additional guidance, here’s a quick walkthrough with some screen shots.

After downloading the Windows 7 RC ISO from Microsoft, open VMware Workstation and create a new virtual machine, the same way I’m sure you have done many times before via “File>New>Virtual Machine”


In New Virtual Machine wizard, use the “Typical” Configuration


Once you point the New Virtual Machine Wizard at the Windows 7 ISO you just downloaded, VMware Workstation will automatically recognize it as Windows Vista. This is okay, since Easy Install for Vista works seamlessly with Windows 7. It will automatically install VMware Tools which is necessary for many of Workstation’s advanced features like shared folders, Unity,etc.


Next, enter your serial key, name, password and click “Next”.


Change the Disk capacity to 40GB if you plan on installing MS Office and some additional applications. Don’t worry; it will start much smaller than 40 GB and only grow to that size if needed.


At this point, you should see your final configuration setup, with 1 GB of RAM assigned, and a virtual hard disk that will expand up to 40GB. Click “Customize Hardware” if you wish to make changes. Click “Finish.” Once you hit “Finish,” Windows Easy Install will be off and running, installing Windows 7. You’ll see some reboots, and VMware Tools will install automatically.


If you didn’t enter a Windows 7 license key, watch for this Windows install screen. I left the install running in the back ground, and after I did not respond for some time, Windows continued the install with Starter edition (first on list).


After that’s all finished, you should be able to play around with Windows 7. There is one Windows Quirk to avoid. The default power management options will suspend the VM every 30 minutes. The solution is to create a new Power Management Plan in Windows:
· In Control Panel search, choose search for Power
· Select Choose a power plan
· Then Create a power plan
· Select High Performance
· Enter a name VMware
· Change Turn off Display to Never
· Change Put Computer to Sleep to Never
· Click Create


Again, Windows 7 RC is not a supported configuration, so there could likely be bugs.


For more installation guide if how to install windows 7 on windows xp & vista using vmware, click here.

Thursday, July 28, 2011

How to learn Batch Programming fast and easy

Batch Programming is extremely helpful if you want to automate small tasks, Batch programming is though only restricted to windows platform but it has lots of other uses and the best part is that it's very easy as compared to other programming languages, While browsing on google for batch programming related e-books I came across a fantastic book which teaches batch programming from the very beginning to advanced level, The book is named as "Batch file programming" and is one of the very comprehensive books on batch programming i ever read.


What are batch files?

Before you jump and download this e-book, I would like to give a short introduction of batch programming, Batch files are basically composed of sequence of DOS commands, Batch files can be easily identified by a .bat extension.
Batch File Programming Can Help You Accomplish the following Attacks.
  • DNS Poisoning
  • Packet flooders
  • Dictionary attacks
  • Virus Creation
  • Disabling of logs

Click File1 or File2 to get your hands on this wonderful e-book.

Wednesday, July 27, 2011

How To Install 64-bit Flash Player 11 In Ubuntu 11.04 “Natty Narhwal”


A while back, Adobe has finally delivered on its promise and released a native 64-bit Flash Player for Linux. if you are on Ubuntu 11.04 64-bit and want to update to Flash Player 11, here is what you have to do.
To install Flash Player 11 on Ubuntu 11.04 64-bit, we will use SevenMachines’ PPA. The PPA has been already updated with the latest release from Adobe.

So, open the Terminal and execute the command below to add the PPA.
sudo add-apt-repository ppa:sevenmachines/flash
Now update the software list.
sudo apt-get update
Finally install Flash 11 with the command given below.
> sudo apt-get install flashplugin64-installer

Here is a screen shot of a Flash video being played on Ubuntu 11.04 64-bit with Flash Player 11.

Tuesday, July 26, 2011

Run ubuntu with your current windows system

Wubi is an officially supported Ubuntu installer for Windows users. If you’ve got Windows, you can run Ubuntu within your current system with the Windows installer (Wubi). That way,  It can install and uninstall Ubuntu in the same way as any other Windows application. It's simple and safe.


Click File1 or File2 to download the latest version of Ubuntu. This Windows installer (Wubi) will help you to run Ubuntu within your current system.

* After the file is downloaded, you have to open it to run the installer. If you are using Internet Explorer, you'll be asked whether you want to run or save the file. Choose 'Run' to launch the installer.


* Most other browsers, like Firefox, will only ask you to save the file. Click 'Save' and then double-click the downloaded file to launch the installer.


* If a security message like this appears, click 'Continue' to proceed with the installation.


* To install Ubuntu, all you need to do is choose your username and password. Please note that you have to enter your password twice to make sure you typed it correctly.

* After choosing your password, click 'Install'. The files will be downloaded and installed automatically.


* Wait until Ubuntu is downloaded and installed. Please note that the whole process can take a while – the downloaded file size is 700MB


* When the installation is complete, you will be prompted to restart your computer. Click 'Finish' to restart. 


* After your computer restarts, choose 'Ubuntu' from the boot menu.


And its done! :)

Install BackTrack to Disk

NOTE: It is recommended that you have a minimum of 10 GB free disk space to install Backtrack!

* Boot the Backtrack Live Environment.
* At the bash prompt, type startx to enter the GUI.
* Double click the Install Backtrack.sh on the desktop
* Let's run through the installer step by step:

    * We select our language, in this case English and then click the Forward button


    * Here we select out geographical location (The Region and Time Zone) and click Forward. 


    * Chose your keyboard layout. We are going to leave it the default which is USA and click Forward.


    * Now it’s time to partition the Disk, for a full Disk installation we choose the “Erase and use the entire disk” option and click Forward.


    * In this screen we are able to check our install options, check them to make sure everything is right than click “Forward”.


    WARNING: When the installer reaches 99% the process might take some time so DO NOT panic, wait about 10-15 minutes.


    * Hit the Restart Now button, and enjoy Backtrack


    * After the reboot, you can log in with the default username root and password toor. Do not forget to change this default root password by issuing the passwd command. 

    * As you can see the splash screen disappeared after the reboot. In order to fix it just run fix-splash, and the splash screen will appear on the next boot.