Tuesday, August 30, 2011

Angry Birds full version for PC


Download Angry Birds Full Version Free. In Angry Birds, gamers manage a flock of multi-colored birds that are trying to retrieve eggs that have been stolen by a group of evil green pigs. On each degree, the pigs are sheltered by structures made from several supplies this kind of as wooden, ice and stone, and also the goal of the sport would be to remove all of the pigs within the stage. Using a slingshot, gamers kick off the birds using the intent of possibly hitting the pigs straight or harmful the structures, which might trigger them to collapse and destroy the pigs. In several phases of the video game, additional objects this sort of as explosive crates and rocks are identified in the levels, and may be used along with the birds to destroy hard-to-reach pigs.

There are many several types of birds employed in the video game. Inside the earliest levels, the basic red bird will be the just one accessible. Since the participant advancements via the game, further kinds of birds turn into offered; several of these birds are far more powerful towards certain materials or they’ve got specific abilities that are activated through the player after the bird has become introduced. By way of example, a blue bird can separate into 3 birds, a black bird explodes, along with a white bird can drop explosive eggs. The pigs on their own also appear in different measurements. Although modest pigs are reasonably weak and so are simply destroyed possibly by direct hits or by particles through the harmed structures, greater pigs can maintain more hurt. Also, some pigs use helmets as armor, creating them far more resistant to harm, even though pigs with crowns can take essentially the most damage.

Each and every stage commences with all the range, kinds, and buy of birds pre-determined. If every one of the pigs are defeated by the point the final bird is used, the stage is accomplished as well as the following level is unlocked. Factors are scored for each pig defeated also as for hurt to, or destruction of, constructions, and bonus factors are awarded for any unused birds. Upon finishing each and every stage, players receive one particular, two, or 3 stars, according to the score acquired. People might re-attempt unlocked ranges as a lot of moments as they want in order to full them productively or to earn extra points and/or stars.

System Requirements:

* Operating system - Windows XP / Vista / 7
* CPU - Intel Core 2 Duo E6600 or AMD Phenom X3 8750 or better
* Memory - 2GB
* Hard drive space - 12GB
* Graphics hardware - Shader 3.0 or better 256MB NVIDIA GeForce 8600GT / ATI (AMD) Radeon Radeon X1950Pro or better

Update:

"Texture is too large 2048 x 2048, maximum supported is 1024 x 1024" problem?
Make sure the you have the latest display adapter drivers installed either through Windows Update or hardware configuration. Please note that Angry Birds requires OpenGL, which is not supported on GMA 500 graphics adapters.

Angry Birds free play games with Google Chrome


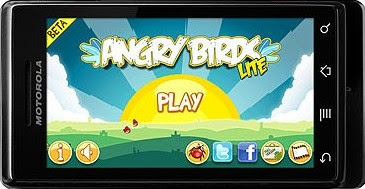
Angry Birds Game Download in your PC Computer or Play Angry Birds Game in your Google Chrome Browser both Online Version and Offline Version, Most of Childern addict Angry Birds Game, Angry Birds Playing Available on Iphone, Ipod, Android, Symbian Mobile Phones, Mobile Angry Birds Game Apps.

Angry Birds Game Online Google Chrome Official Page For Play

Play Angry Birds Game Very Fast with High Definition Version and Standard Version, if your internet connction slow choose Standard Version, otherwise choose HD Version.

Angry Birds Game Offline Google Chrome Addon For Download


Now Click Install Button and Play Angry Birds game on your Google Chrome Browser in Offline mode, Play Angry Birds Game on Any PC Computer like Windows XP, Windows Vista, Windows 7 and Mac os.

Angry Birds Rio Android apk Games Apps Downloads


Angry Birds Rio Android Apk Games Apps Download. Angry Birds are one of the most popular games for the iPhone and made his way into the Android. Your goal is to sling up to five angry birds loose structure made with pigs at home and destroy all the birds giving their revenge. Get bonus points for destroying everything with the birds left over, another if you do not destroy everything and use all your birds failed round.

Angry Birds in Android has the same super smooth graphics and game, as the iPhone. The stages can be filtered around to get a better idea of ​​where to hit, to merge it with fluid movement parallax vector graphics and live and have a live winner!

Angry Birds Game is One of Most Downloading Games on All Mobile Games Application for Apple IPad, Apple Iphone, Android Mobile Device Apps, Angry Birds Game is Paid Game for Many Websites and Apple Store, But Angry Birds Game Now Available For Full Version Free Download, Angry Birds Game Download Version Some Features Limited compare with Paid Angry Birds Game.

Angry Birds Rio

Click the image to play online!

Finally, I’m having some good news for die hard Angry Birds Rio fanatics that this game is available to download from App store.
In Angry birds Rio the original angry birds are kidnapped and they’re forcefully moved to the city of Rio de Janeiro, this is where they eventually escape from the sight and go out to save their friends, Blu and Jewel, and someone who is known to be the starts of the upcoming fox motion pictures, Rio. Now how cool is that? With pretty much carved out of the film, the game is having some unique twists this time for the users to experience it and I’m sure you would love the story line.

Angry Birds Rio Features:

- Two superb episodes with 60 levels to finish
- New achievements, completely!
- New hidden fruits, it is your job to uncover them.
- Through Boss flight you can test your Angry Bird Rio skills that is an ultimate test.

Click here to download Angry Birds Rio

Angry Birds Seasons


Angry Birds Seasons is the gift that keeps on giving! Get into the spirit of Halloween, Christmas, Valentine's Day, St.Patrick's Day, Easter and more upcoming seasonal varieties of Angry Birds. These special episodes offer more challenging levels of pig-popping action and golden eggs to discover. COMING SOON!


Angry Birds Shop / Like Angry Birds on Facebook

Sunday, August 28, 2011

Hide IP address & Surf as Anonymous

One of the most frequently asked questions by the internet users is Can I Hide My IP Address? I’ll start by saying yes, it’s possible to hide or “spoof” your IP address. But before we go on, let’s talk about IP addresses for a moment.When you connect to the Internet, your ISP assigns you an Internet Protocol (IP) address, which in most cases changes every time you connect. Your IP address was never meant to be a secret. Whenever you connect to a website, download a file, or chat online, your IP address is sent along with your request to communicate. This means that your IP address could be used by hackers to break into your computer, steal personal information, or commit other crimes against you.


The best way to protect your identity while surfing the Web is to mask your true IP address. You can do this by using a proxy server in one form or another, or download a software that will really hide your IP address. I have tried many such softwares and have found only few of them working perfectly. Here is a list of working IP Hiding softwares that you can try. I have listed them in the order of their popularity.


I recommends the following IP Hiding Softwares to hide your internet identity

1. Hide The IP


Click here to download Hide the IP

Hide The IP is a software that will let you surf anonymously, change your IP address, guard against hacker intrusions and prevent identity theft. Compatible with all web browsers.

Hiding your IP address is as simple as clicking the “Hide The IP” button, which automatically configures your web browser or other application to use a proxy server from our private proxy network. Change your IP address automatically every few minutes and cloak your browser’s User Agent and Referrer headers. Select from hundreds of our private network IPs or public proxies from all over the world.

Hide The IP supports the Gold Pass level of service, allowing access to exclusive IP locations at Premium speeds as well as 128-bit SSL traffic encryption. Other new features include hotkey support, cookie blocking, IP history, and IP SmartSwitching to randomize your IP addresses.

Whenever you surf the Web, you leave yourself open to being snooped upon by web sites. They can track your online travels, know what operating system and browser you’re running, find out your machine name, uncover the last sites you’ve visited, examine your history list, delve into your cache, examine your IP address and use that to learn basic information about you such as your geographic location, and more. To a great extent, your Internet life is an open book when you visit.

Sites use a variety of techniques to gather and collate this information, but the two most basic are examining your IP address and placing cookies on your PC. Matching your IP address with your cookies makes it easier for them to create personal profiles. 

Hide The IP is a Software which masks your true IP address to protect your anonymity while surfing the Web. On the other hand Hackers can use this software to hide their identity and not get caught. It is beneficial for all and i recommend that every PC should have this software installed.

By hiding your IP you will prevent receiving spam from marketers which know your interests by tracking your IP when browsing websites. You can use web based e-mail to send anonymous e-mail.

We found this application to function simply and effectively: click the lock icon, and within seconds the program has found and acquired a false IP for you. Your real and current IP addresses are displayed in the application window.

Hide The IP Top Features:

Hide IP Address

One click to completely hide your IP address. Others will see the hidden IP address which masking your real IP, and protecting your privacy.

Select Your Physical Location

You decide which country to be indicated as your origin by simply choosing from a country list. We have hundreds, hourly updated IP addresses available for use.

Anonymous Surfing

You are protected from hackers who will be tricked by your new IP address instead of your real. They will never be able to find any information about you by tracing the masked IP.

Send Anonymous Emails

Hide your IP in E-mail headers. Be protected while sending emails from Yahoo!, Hotmail, GMail. Upgrading to Platinum Service add-on will protect you in Outlook!

Bypass Website Country Restrictions

Surf anonymously websites restricted for your country. Surf in forums on which you were banned.


2. Hide My IP


Hide My IP masks your true IP address to protect your anonymity while surfing the Web. We found this portion of the application to function simply and effectively: click the lock icon, and within seconds the program has found and acquired a false IP for you. Your real and current IP addresses are displayed in the application window.

Hide My IP is an advanced IP changer, bypass virtually any form of censorship or internet traffic blocking imposed on you by your ISP, your company, or third parties. Your internet traffic is routed through remote servers. On your ISP’s log file, only the IPs of the remote servers will be shown, not the sites you have visited.

It protects your identity by replacing your real IP address with a different one. You will appear to access the internet from a different location, not your own. Your real location is never revealed.


Did you know your IP address is exposed every time you visit a website? Your IP address is your online identity and hiding it is the smartest thing you can do to protect your privacy online. You may want to hide your identity just because you want to be anonymous, or maybe because you are doing illegal stuff. Either way here is how to hide your identity online.

Hide My IP masks your true IP address to protect your anonymity while surfing the Web. This application will deliver you several fresh anonymous proxy servers every time you will launch the program.

The main benefit of this software is that you can’t be traced when browsing websites. Also if a website is restricted for users from specified country the program can bypass that protection.

Hiding your IP address is as simple as clicking the “Hide My IP” button, which installs a “fake ip” in your favorite web browser including Internet Explorer, Firefox, Google Chrome, Safari, Opera, Netscape, and many more! When you close Hide My IP, your Internet settings will revert back to normal.

Hide My IP Top Features:

Anonymous Web Surfing

Prevent others from seeing your true IP when browsing the Internet. Change your IP frequently with the click of a button!

Protect Your Identity

Identity thieves can use your IP address to monitor your web activity and intercept your private financial information. Criminals, hackers, and even the government can trace your exact location right down to your street address.

Encrypt Your Internet Connection

Prevent your Internet Service Provider or hackers on wireless networks sniffing your web browsing traffic by using the “Encrypt My Connection” feature, which creates a secure 128-bit encrypted link between your computer and your hidden IP.

Send Anonymous E-mails

Prevent your real IP address from being shown in E-mail headers on any Webmail E-mail service such as Yahoo, Hotmail, or Gmail. It is very for anyone to find your geographic area you send E-mail from using free publicly available IP lookup tools.

Un-ban Yourself From Forums and Message Boards

Have you been banned from a forum or message board? No problem! Use Hide My IP to change your IP and clear your browser cookies, allowing you to access any website that has banned you such as eBay, Craigslist, and many browser-based games.

How It Works

When you browse the Internet normally, your computer makes a direct connection to the websites you visit. With Hide My IP running, an anonymous proxy server is set to relay information between you and the websites you visit, hence web sites see the fake relay IP and not your real IP address.


Where are these fake IP addresses located? Hide My IP selects a random IP from a list of hundreds of anonymous fake IPs from all over the world. The chosen IP is then automatically installed into your web browser, e-mail client, game, or other application you specify Hide My IP to work with, allowing you to surf the Internet and use Internet-based software while remaining totally anonymous.

Do you have questions, comments, or suggestions? Feel free to post a comment!

Saturday, August 27, 2011

How to Create More Than 10 Email Accounts in Google Apps

In a recent update in Google Apps Infrastructure, Google limited new Google Apps users who have registered after 10th May, 2011, can create only 10 email accounts. If users want more than 10 email accounts, they have to buy the paid version of Google Apps. The old users are not affected with this change. However, there is a simple trick to create more than 10 email accounts in Google Apps. The trick is legitimate and is allowed by Google. The trick works on the Email Alias function. It allows you to receive emails sent to multiple email addresses to a single email Inbox. Google calls Email aliases as Nicknames, thus keep this in mind while going further.


Here’s the step-by-step guide to setup Email Aliases (Nicknames) in Google Apps.

1: Go to https://www.google.com/a/domain.com (replace domain.com with your own domain name)

2: Login with your Google Apps Admin account.

3: Click on Organization & Users link on the top

4: Now, you will be able to see the Email accounts created under your domain in Google Apps. Choose any email account for which you want to create email alias.

5: Now, you can create Nicknames for your email address. Click on Add a Nickname and type the nickname you wish to have. Then, press the Save Changes button to save the changes you have made.


That’s it. Now, whenever someone sends an email to the nickname (In example, inquiry[at]productions.com), it will reach the main Email inbox located in inquiry[at]productions.com. This way, you can create more than 10 email accounts in Google Apps without buying the paid version.
The above trick will work with incoming emails only, What if you want to send emails using that nickname as FROM address? Well, answer is simple. You can use the built-in feature of Gmail (Google Apps), the Add an Account feature. It lets you send emails using another email address. To do so, you have to verify the email address which you want to use as FROM address. Follow these steps to verify your newly created nickname email address.

1: Go to https://mail.google.com/a/domain.com (replace domain.com with your own domain name)

2: Click on the Settings at the top right corner.

3: Now, in Settings menu, switch to Accounts and then fill the information in the appropriate fields.


4: The Gmail will send a verification code to the email address you filled in the step 3, you have to enter it to verify the email address.

The process is finish now. From now on, you will be able to send emails using the Nickname as well as receive emails on that nickname.

Friday, August 12, 2011

Making a Trojan Virus in ProRat v1.9

Here i'll show you how to hack email account password using keyloggers and trojans. Here I am demonstrating using PRORAT trojan. You can use any trojan or keylogger as per your ease. The basic functionality of all backdoors are same. Pls make note that all these hacking tools and softwares are detected by antivirus. You have to uninstall or close you running antivirus first. Now we can start.

1. First of all Download ProRat v1.9. Once it is downloaded right click on the folder and choose to extract it. A password prompt will come up. The password will be "InfoTech4pc".

2. Open up the program. You should see the following:


3. Next we will create the ProRat Trojan server. Click on the Create button in the bottom. Choose Create ProRat Server.


4. Next put in your IP address so the server could connect to you. If you don’t know your IP address click on the little arrow to have it filled in for you automatically. Next put in your e-mail so that when and if a victim gets infected it will send you a message. We will not be using the rest of the options.


5. Now Open General Settings. This tab is the most important tab. In the check boxes, we will choose the server port the program will connect through, the password you will be asked to enter when the victim is infected and you wish to connect with them, and the victim name. As you can see ProRat has the ability to disable the windows firewall and hide itself from being displayed in the task manager.

Here is a quick overview of what they mean and which should be checked:


6. Click on the Bind with File button to continue. Here you will have the option to bind the trojan server file with another file. Remember a trojan can only be executed if a human runs it. So by binding it with a legitimate file like a text document or a game, the chances of someone clicking it go up. Check the bind option and select a file to bind it to. A good suggestion is a picture or an ordinary text document because that is a small file and its easier to send to the people you need.


7. Click on the Server Extensions button to continue. Here you choose what kind of server file to generate. I prefer using .exe files, because it is cryptable and has icon support, but exe’s looks suspicious so it would be smart to change it.


8. Click on Server Icon to continue. Here you will choose an icon for your server file to have. The icons help mask what the file actually is. For my example I will choose the regular text document icon since my file is a text document.


9. After this, press Create Server, your server will be in the same folder as ProRat. A new file with name "binded_server" will be created. Rename this file to something describing the picture. A hacker could also put it up as a torrent pretending it is something else, like the latest game that just came out so he could get people to download it.

Very important: Do not open the "binded_server" file on your system.

10. You can send this trojan server via email, pendrive or if you have physical access to the system, go and run the file. You can not send this file via email as "server.exe", because it will be detected as trojan or virus. Password protect this file with ZIP and then email it. Once your victim download this ZIP file, ask him to unlock it using ZIP password. When the victim will double click on the file, he will be in your control.

11. Now, I will show you what happens when a victim installs the server onto his computer and what the hacker could do next.

Once the victim runs the server on his computer, the trojan will be installed onto his computer in the background. The hacker would then get a message telling him that the victim was infected. He would then connect to his computer by typing in his IP address, port and clicking Connect. He will be asked for the password that he made when he created the server. Once he types it in, he will be connected to the victims computer and have full control over it.


12. Now the hacker has a lot of options to choose from as you can see on the right. He has access to all victim's computer files, he can shut down his pc, get all the saved passwords off his computer, send a message to his computer, format his whole hard drive, take a screen shot of his computer, and so much more. Below I’ll show you a few examples.

  
13. Below is an image of what the hacker would see if he choose to take a screen shot of the victims screen.


As you saw in the above example, a hacker can do a lot of silly things or a lot of damage to the victim. ProRat is a very well known trojan so if the victim has an anti-virus program installed he most likely won’t get infected. Many skilled hackers can program their own viruses and Trojans that can easily bypass anti-virus programs.

Thursday, August 11, 2011

ShareCash Downloader (Download from ShareCash without doing surveys)

Sharecash Downloader to Bypass Sharecash Downloads:

Sharecash downloader helps you to bypass Sharecash surveys. Follow the steps below and you will be able to bypass Sharecash.


1. Free Download Sharecash Downloader from here.

2. Extract and run this Sharecash downloader on your computer.


Select the "Original" checkbox and use sharecash original link.

Note: Also provided Sharecash Reflector to convert Mirror link to original sharecash link.

3. Copy your Sharecash file link, paste it in the text box and hit on Navigate to sharecash link button. After that Download button will get visible.


4. Wait for few seconds and click the Download Button. New window will appear asking you for the output location where you want to save the file, and click Yes.


Sharecash Downloader will start downloading your file from Sharecash without requiring you to complete sharecash surveys.


Now you are able to bypass Sharecash survey using Sharecash Downloader software.

Please Note: If nothing happens when you start the program or if you get any error messages upon launching the program, download and install the latest version of Microsoft .NET Framework.

Monday, August 08, 2011

How to setup a localhost with Lamp Server in Ubuntu

Although, I use Ubuntu, this should apply to a large number of linux distros. Every developer uses a local environment to develop locally before testing it live. I kinda avoid that root by mounting my FTP webspace in Ubuntu and directly working on live files (there is no need of download and upload as you might think), but I wanted to do some CPU intensive job for a client for which I needed to setup a localhost environment, so I thought I would share this with everyone on my blog.

Install LAMP Server


Fire up a terminal (Applications > Accessories > Terminal) and enter this command:

sudo apt-get install lamp-server^


Enter y for yes when it asks to continue after estimation of how much data will be downloaded and how much will be used on disk.
It will install quickly and can take a few minutes depending on your internet speed, and then it will ask you to setup the password for MySQL user root. It is usually left blank on localhost machines as they are used only for development purposes but last time I left it blank, I had to deal with the issues that it didn’t change the password to blank but has something else and I had to turn off the password prompt for root access. Avoid doing all that by just selecting “root” or anything you want as the password of the root user of MySQL.


Confirm it once (Type the password and press Tab key).


and you are done.


Test Apache Webserver


Just open http://localhost/ in your browser and it will show up this page,


which means Apache is working fine.


Test PHP


Create a file named phpinfo.php in /var/www/ to check if PHP is working fine.

sudo nano /var/www/phpinfo.php

Enter the content as <?php phpinfo() ;?> and save the file by hitting Ctrl + X and then Y (for yes) and return key (enter).

Restart Apache webserver by the following command. sudo /etc/init.d/apache2 restart

Now open http://localhost/phpinfo.php and it will show up a page with lots of php related information,


if you can see it, PHP is working fine.


Install phpMyAdmin


Enter this command in terminal. sudo apt-get install libapache2-mod-auth-mysql phpmyadmin


Select Apache2 as the web server by pressing Space and then Tab key and press enter key.


Press Yes to configure database for phpmyadmin.


Provide password which we set as “root” earlier.


Again, enter “root“.


Confirm it, and then you are done.


Test phpMyAdmin


Now open http://localhost/phpmyadmin/ in your brower to access phpmyadmin and you can login with username and password both as root.


Code for other installation:
sudo apt-get install apache2 apache2-doc mysql-server php5 libapache2-mod-php5 php5-mysql phpmyadmin

Pretty quick & easy!

Enter this command to edit permissions & access your web directory, sudo nautilus and go to File System your web root at /var/www/ where you will need super user permissions to write files.


Everything is done.

Saturday, August 06, 2011

Installing EZPrompt v6.0 .0 & Transferring The License


EZPrompt Version 6.0 is a 100% ®Windows-based Prompting software for use by:
  • Television Stations
  • Production Houses
  • News Organizations
  • Public Speakers
EZPrompt Version 6.0 has been tested with Microsoft ®Windows 7, ®Windows Vista, ®Windows XP Professional, and ®Windows XP Home. Acceptable performance has also been reported on ®Windows 2000 Professional Systems.

EZPrompt Version 6.0  can load most standard word processor files, and includes its own powerful text editor/spell-checker. (Important: See the topic Office 2007 Advisory)

This release includes EZPrompt Direct, a separate utility that permits the user to launch EZPrompt Version 6.0 directly and immediately begin prompting.

There are three (3) optional modules available for EZPrompt Version 6.0 .0

PowerPoint Module: EZPrompt Version 6.0 supports the use of Microsoft PowerPoint presentations and slideshows, which can be synchronized to the script as they scroll through the prompter. The PowerPoint feature requires dual monitors, and is an optional module that requires an additional license. It is enabled during the demo period to give you an opportunity to evaluate it and make an informed purchasing decision.

Caption (Closed Captioning) Module: EZPrompt Version 6.0 supports Closed Captioning of text. Closed Captioning is an optional module that requires an additional license. With Closed Captioning enabled, text is fed to the Closed Caption Encoder (not included) as it is scrolled through the prompter. Contact ADS Sales for additional information.

Rundown (Multi-Script Rundown) Module: EZPrompt Version 6.0 supports use of multiple scripts and user-definable rundowns. EZRundown is an optional module that requires an additional license. Contact ADS Sales for additional information.

EZPrompt Version 6.0 is a product of:
    Automated Data Systems of Wisconsin, Inc.
    115 Fifth Avenue South, Suite 500
    La Crosse, WI 54601
    608.785.1415 - Fax: 608.785-1478
    tech@autodatasys.com

  
Installation Guide

Internet Installation
  • Go to http://www.ezprompt.com ... to Download
  • Select EZPrompt Version 6.0 's Setup.exe file (Setup60.msi or Setup60.exe) from the list
  • Provide requested information. An authorization link will be emailed to you, so make sure information you provide is accurate.
  • Download Setup.exe and save to your computer's hard drive. Do not let your browser try to open the file while you are connected to the website.
  • Run the setup program and follow on-screen instructions in the EZPrompt Version 6.0  installation program.
  • When installation is completed, it is recommended you restart your computer.
CD-ROM Installation
  • Insert EZPrompt Version 6.0  CD in the CD-ROM drive of your computer
  • On most systems, the installer program will start and ask if you wish to continue.
  • If the installed program does not start automatically, click your computer's Start button, and choose RUN
  • Type D:\SETUP60 (substituting the drive letter assigned to you CD) and touch ENTER.
  • Follow on-screen instructions in the EZPrompt Version 6.0  installation program.
  • When installation is completed, it is recommended you restart your computer.
Run the program & load sample doc.


      Press Prompt Now or F2 for shorcut key


      Make sure you register your software

      ADS will provide customer support and software updates for a period of 1 year for registered users. Upon receipt of your software registration, ADS will provide information on accessing updates and customer support services.

      Hardware Requirements

      EZPrompt Version 6.0 requires no proprietary hardware, and only requires the computer and memory resources specified by Microsoft for their ®Windows 7 (all releases), ®Windows Vista (all releases), and ®Windows XP Professional.
      EZPrompt Version 6.0  also can provide acceptable performance on older, obsolete Operating Systems (®Windows 2000 Professional, ®Windows NT Workstation, ®Windows '98SE, and  ®Windows ME).
      EZPrompt Version 6.0  may not provide acceptable performance on ®Windows '98 and ®Windows '95. It will not operate under ®Windows 3.1, or ®Windows for Workgroups.
      For best performance, it is recommended, but not required, that the computer you will use EZPrompt Version 6.0  on have the following minimum resources:
      • 1 GHz 32-bit processor.
      • 1GB or more RAM
      • Accelerator video card with 32mb or more memory (recommend DirectX 9 graphics processor with WDDM).
      • Wheel mouse (Microsoft ®IntelliMouse or ®Logitech First Mouse Plus)
      EZPrompt Version 6.0  includes a standard ®Windows-based text editor and spell-checker. In addition, EZPrompt Version 6.0  can import documents from virtually any Windows-based word processor that saves files in any of the following formats:
      • MS Word (all versions)(*.doc)
      • EZPrompt Version 6.0  Text (*.txd)
      • Rich Text (*.rtf)
      • ASCII Text (*.txt)
      IMPORTANT NOTE: Documents that are linked to Microsoft PowerPoint presentations must be saved as EZPrompt Documents (.EZP)

      System Requirements

      EZPrompt Version 6.0 has been carefully engineered to operate on computers that are running under Microsoft's ®Windows 7 (all releases), ®Windows Vista (all releases), ®Windows XP Professional, and ®Windows XP Home operating systems.

      Depending on hardware, available resources, drivers that are loaded, etc. it may also function under ®Windows 2000 Professional,  ®Windows ME, ®Windows NT Workstation, and ®Windows 98SE, however ADS makes no claim to support these operating systems.

      Computers

      Computer hardware and the drivers required for various hardware components vary significantly. Thus, it is not possible to test the software on every conceivable hardware configuration. The ADS testing program is aimed at name-brand machines readily available over the counter at most computer dealers and retailers.

      In general, EZPrompt Version 6.0  will operate on Pentium computers that run at 800mHz (or faster), with 128mb (or more) of RAM.

      It must be understood, however, that older computers with limited resources may not perform as well as up to date computers with resources that are appropriate to the software and operating system.

      It is recommended that the computer running EZPrompt Version 6.0  be equipped with at least a 4mb VGA video adapter.

      Some systems will operate satisfactorily with 1mb video adapters with one caveat: the mirroring function (required for use with LCD panels) works best on computers with 2mb or more of Video Memory. With the mirroring function enabled, machines with 1mb video adapters may experience a less stable scroll.

      Mouse vs. Touchpad

      On machines with touch pads, speed control is difficult at best. This is due to the way touch pads work and has nothing to due with the EZPrompt Version 6.0  software. On machines that have touch pads an external mouse is recommended.

      EZPrompt Version 6.0  and Networks

      With respect to Local Area Networks (LAN), EZPrompt Version 6.0  is not a network application, and cannot be used in a multiple user configuration. That being said, EZPrompt Version 6.0  will operate on computers attached to networks. EZPrompt Version 6.0  has been tested on machines running on Microsoft NT networking, with both NetBEUI and TCP/IP protocols.

      EZPrompt Version 6.0  makes no network calls, and is not using any IRQ or memory areas typically assigned to networks.
       
      Transferring The License

      EZPrompt Version 6.0 is LICENSED SOFTWARE, and the license permits you to run only one instance of EZPrompt Version 6.0  for each license you have purchased. In other words, you cannot use this license on more than one computer. If you need to run EZPrompt Version 6.0  on more than one machine, you should either:
      • Transfer the License if your need is for occasional use on a second machine, or
      • Purchase additional licenses to satisfy your requirements. Contact the dealer you purchased EZPrompt Version 6.0  from or ADS for further information on additional licenses.

      To Transfer the License from one machine to another, you will need to be able to access the same removable media on both the machine that has the licensed copy of software (referred to here as the LICENSED MACHINE) and the machine you wish to transfer the license to (referred to here as the UNLICENSED MACHINE).

      Removable media is defined as:
      • A blank, pre-formatted floppy disk
      • A standard USB jump drive (sometimes referred to as a 'thumb drive')
      • A rewritable CD-ROM (CD-RW)
      • You may also use a mapped networked drive which is accessible to both computers.
      • You will also need the EZPrompt Version 6.0  setup program (on either a CD-ROM from the manufacturer or software downloaded from EZPrompt.com).
      The procedure is as follows:

      1.
      First, you must have the same version of EZPrompt Version 6.0  installed on BOTH computers.


      On the UNLICENSED MACHINE

      2.
      Run EZPrompt Version 6.0  on the UNLICENSED MACHINE
      3.
      If the demo period on the UNLICENSED MACHINE has expired, the Registration dialog asking for an Activation Code will come up. Click the Prepare Transfer button


      4.
      If the demo period on the UNLICENSED MACHINE has not expired, dismiss the demo period advisories, click the License menu and select Register. The Registration dialog asking for an Activation Code will come up. Click the Prepare Transfer button.
      5.
      You will be prompted for the License Transfer Path. You can either:


      a.        Type the drive letter for your removable media,
      or …
      b.        Use the Browse button to locate your removable media or network drive.


      6.
      When you click OK, the removable media will be prepared.

      On the LICENSED MACHINE

      7.
      Go to the LICENSED MACHINE (the one with the EZPrompt Version 6.0  license), and start EZPrompt Version 6.0 
      8.
      Click the License menu and select Transfer.
      9.
      You will be prompted for the License Transfer Path. You can either:
      a.        Type the drive letter for your removable media,
      or …
      b.        Use the Browse button to locate your removable media or network drive.
      10.
      Follow the on-screen instructions
      11.
      The license will be transferred to the removable media … the machine that had been previously been licensed is now un-licensed.

      On the UNLICENSED MACHINE

      12.
      On the UNLICENSED MACHINE (the one you want to transfer your license to), run EZPrompt Version 6.0 .
      13.
      When you get the dialog box asking for an Activation Code click the Transfer License button.
      14.
      You will be prompted to supply the drive letter for the removable media. You can either:
      a.        Type the drive letter for your removable media,
      or …
      b.        Use the Browse button to locate your removable media or network drive.
      15.
      When the removable media is found, the license will be transferred.

      You can transfer the licensing data from one computer to the other as often as you like.